Food scraps make up a big chunk of household waste. In countries that have a pay-per-use system of waste collection, you could be spending money to have your organic waste taken ‘away’ instead of using it to feed your garden, containers, or house plants. Most people don’t realise how simple it is to compost waste at home and make free fertiliser for your leafy friends. If you’ve ever accidentally strayed into composting Facebook groups or subreddits, you’ll be forgiven for thinking that composting is a highly specialised field only suited to those with chemistry degrees. The myths that circulate about what you must and mustn’t do with a compost heap are contradictory and off-putting.
The truth is that you can compost at home with minimal effort and no specialist equipment. It should take no more time than throwing your organic waste in the bin currently does. You don’t need to monitor the balance of your heap, take its temperature, or spend back-breaking mornings turning it over UNLESS YOU WANT TO. There is no need for long lists of foods that can and cannot be added. Don’t overthink it, simply start a pile in an easy to access part of your garden and add to it when you want.
Cold composting vs hot composting
The main technique we’re discussing in this how-to article is called ‘cold composting’. It’s the easiest type of compost and the best way to get started. If you enjoy the process, you can learn techniques to optimise your heap for faster, neater results. If you find yourself fascinated by composting and want to get nerdy about it, you can try hot composting – and, yes, for that you might want to acquire some tools and materials. Cold composting is letting nature decompose organic matter in its own time (maybe 6 to 18 months). Hot composting is a deliberately managed decomposition process for fast results (in weeks to a few months).
Anything organic left in a pile in your garden will decompose – the naturally present air, moisture, and countless microbes and critters do the work for you. This is important to understand because it means you genuinely cannot fail at cold composting! You might get faster or slower results depending on what you add and how you manage it, but the decomposition will happen regardless.
How to cold compost at home
- What to add: Put in whatever organic ‘waste’ your household produces. A typical house might produce fruit and vegetable peelings and scraps, (biodegradable) tea bags, coffee grounds, crushed eggshells, bread and other baked goods, shredded paper and cardboard, and garden trimmings and clippings. You may also have access to things like urine, chicken poop, horse or donkey manure, pet bedding, wood shavings from the workshop, natural fabric scraps, wood fire ash, and seaweed. All these can be added too.
- What to avoid: Cat and dog faeces can contain pathogens (toxoplasmosis, parasites) that survive cold composting and contaminate soil. Meat, fish, bones, dairy, and cooked food can attract pests, so you might choose to avoid them (but plenty of people add them and don’t have a problem). Whether this is actually a problem depends entirely on where you live and what wildlife is already in your area. Small amounts buried deep in the heap or covered with browns are often fine. If you have an enclosed bin with a secure lid and mesh base, these materials become much less of an issue. You must avoid non-organic or toxic elements like plastic, treated/painted wood, glossy print cardboard/paper, chemicals, coal ash, nappies, vacuum cleaner dust, and synthetic fabrics.
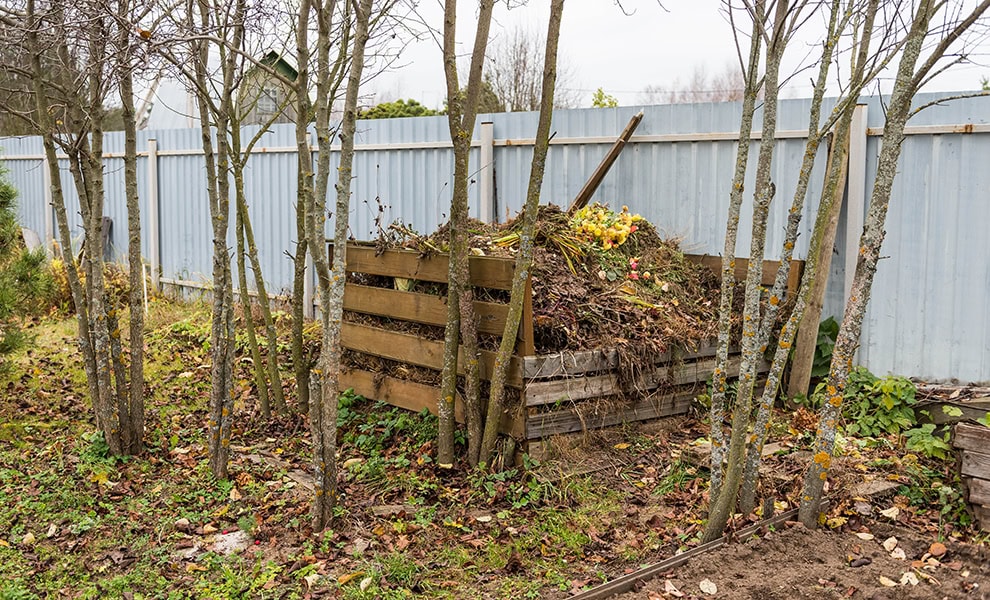
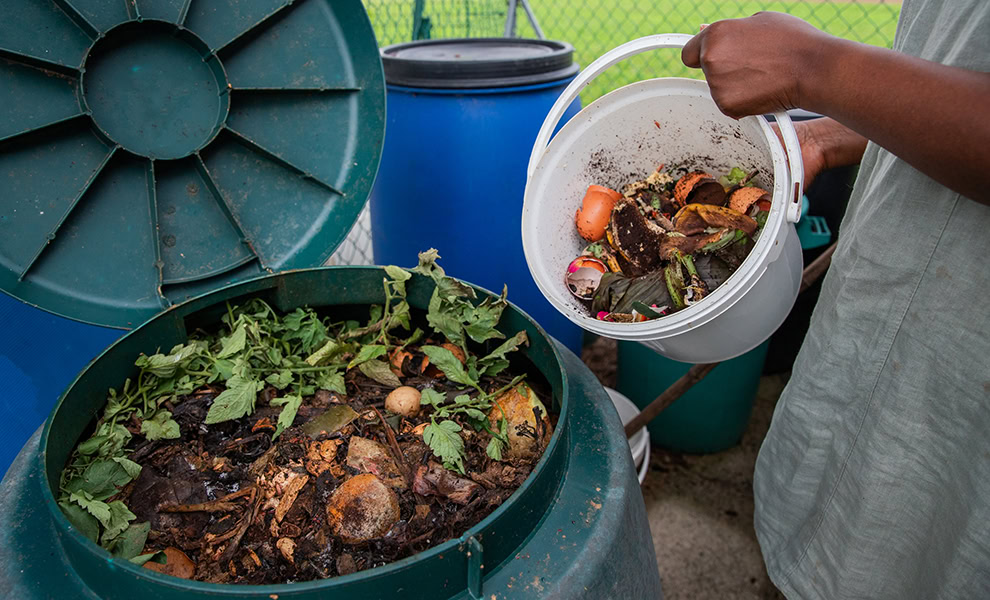
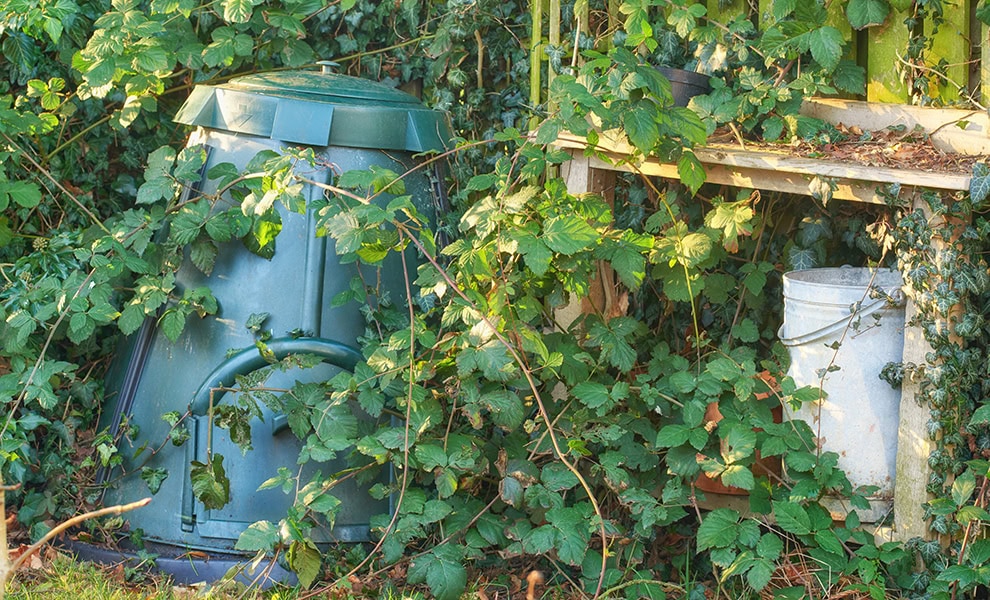
- Where to put it: Any part of the garden is fine, just keep it easy to get to. A pile directly in contact with the ground works best because worms and microbes will move in naturally and the rain will keep it moist. If you want it a little tidier, you can buy a compost bin kit or build your own from old pallets or lumber – three-sided or four-side depending on what you want. You could also buy a ‘Dalek’ – one of the tapered plastic bins that come with a lid for those that don’t want to see their compost at all (and if pest deterrence is important, you can put a metal mesh at the bottom of your Dalek so they can’t easily get access to your heap).
- What happens: Bacteria and fungi are already all around us – in the soil, on plants, in the air. Worms and insects move in to the heap from the ground below. You don’t have to do anything to get these friendly helpers started on your organic waste; they will naturally colonise the heap and start the decomposition process (mould is just visible fungi doing this work).
- What maintenance to do: No maintenance is actually required. If it gets very wet and slimy, add some torn cardboard or dry leaves. If it’s not breaking down, just leave it longer. You don’t have to turn it or add special products, but as you get more experience seeing the heap progress, you will get a feel for when it’s looking a bit wet or dry or could do with different types of material. We look at this in more detail in the FAQs below, but the bottom line is that if you never touch it at all it will still become good compost! It might just take a bit longer.
- When it’s ready: How long it takes will depend on a few factors, including the temperatures you get, so your heap will rot slower in winter than in summer. It may look barely decomposed on the outside, while the middle is already turning into a crumbly, soil-like material. You can put it straight onto your garden as a mulch that the worms will incorporate into the soil for you or you can sieve it first if you want a fine material for seedlings or potting.
To learn more about what can and can’t go into a compost, check out our ‘Compostable or Not?’ search tool with over a hundred different items (and counting).
Variations & alternatives
We're focused on cold composting in this how-to, but some alternative approaches are listed below. See the FAQs for some pros and cons of each method.
Hot composting methods
Hot composting is managed, accelerated decomposition that heats the pile to 55°C to 65°C through microbial activity. You need a critical mass of material (at least a cubic metre), the right balance of nitrogen-rich ‘greens’ (like fresh grass or food scraps) and carbon-rich ‘browns’ (like cardboard or dry leaves), adequate moisture, and regular turning to maintain oxygen levels. Built properly and turned every few days, usable compost is generated in 4 to 8 weeks. The heat kills weed seeds, pathogens, and most plant diseases. It’s faster than cold composting but requires effort, timing, and enough material all at once (whereas a household creates waste slowly over time).
Industrial/municipal composting uses hot composting methods. They manage huge volumes (tonnes) at a time, using machinery to turn the rows regularly. They can monitor and control conditions, and the sheer mass generates significant heat so they can process materials home composters can’t: compostable packaging that needs sustained high temperatures; larger volumes of food waste, including meat/dairy (depending on the facility); and diseased plant material. The heat kills pathogens and weed seeds that would survive in cold heaps.
Bokashi composting system
Bokashi ferments food waste anaerobically (without oxygen) in a sealed bucket using bran that’s inoculated with specific microbes. You layer kitchen scraps with the bran, press out the air, seal the lid, and drain off the liquid (‘bokashi tea’) every few days. After 2 to 3 weeks, the waste is pickled but not composted – it still looks like food, just broken down. You then bury it in soil or add it to an active compost heap where it breaks down quickly. This system handles meat, fish, and dairy that many don’t like to cold-compost. But it needs the special bran (an ongoing cost, although you can make your own version), takes up kitchen space, and the liquid smells strong. It’s often proposed as an option for flats without gardens or as a pre-treatment before composting.
Worm bin composting (vermicomposting)
Worm bins use specific composting worms (usually red wigglers or tiger worms, not garden earthworms) kept in a special container to process food scraps. You feed the worms waste like fruit and veg, coffee grounds, and shredded paper. They eat it and produce worm castings, which are nutrient-rich and improve soil structure. Liquid leachate collects at the bottom as waste breaks down, which can be diluted and used as fertiliser. It works indoors or out, is relatively compact, and produces high-quality compost faster than cold composting. BUT worms are fussy; they can’t handle citrus or onions in large quantities, need the right moisture and temperature (they’ll die if it’s too hot or cold), and you mustn’t overfeed them. So this system does require management as well as the initial setup cost but is good for people with limited outdoor space. Worm bins are for kitchen scraps only; unlike a compost heap, you can’t add woody material, hedge trimmings, tough stems, thick cardboard, or large pieces of anything.
Trench composting or in-ground composting
This low-effort and highly forgiving way of composting involves burying your kitchen scraps directly in the soil rather than composting them in a heap first. You dig a hole or trench that’s 30cm to 60cm deep, throw your waste in, cover it with soil, and wait about 6 months. You can plant directly in the spot; in fact, it’s a popular method with vegetable growers who want to enrich specific beds. It’s also good for people who don’t want a visible compost heap or are having issues with pests. While you’re filling the trench/hole, you may want to keep it covered with a board, pallet, tarp, etc., to stop pets and others digging their way to a snack.
A variant on this idea is a buried pot. Take something like a large terracotta pot or a bucket with holes drilled in the bottom and bury it nearly to the top. Add whatever waste you like, and the worms and microbes will move up from the ground to process it. You could put a lid on it for pest deterrence. The nice thing about this approach is it is small and can be tucked into an existing flowerbed so it will be hardly noticeable. You could have a few around the garden if you produce more waste than a single one can handle.
Electronic composters
These expensive kitchen gadgets do not compost. Despite their marketing claims, no natural microbial decomposition is happening. All they do is dehydrate your scraps and chop them up a bit. So the end product is not compost but has cost you five or six hours of electricity to process a few days’ worth of waste. In addition, the dehydrated output can actually cause problems if used directly in soil because it triggers rapid fungal growth when it rehydrates. Advice to put this stuff in your potted plant soil is highly misguided. An electronic composter is at best a pre-treatment for your waste, and it still needs to be composted.
Notes about compost systems
Composting is simply nature’s way of recycling. Anything that lives will die. Anything that dies will decompose. When you compost, you’re just encouraging decomposition to happen in one spot so that you can benefit from the result. Today, we treat waste like a problem to be taken away and dealt with out of sight and out of mind. But on planet Earth there is no such place as ‘away’. Reducing our waste and building healthy soil where we live is a positive action that also makes us less reliant on complex waste management infrastructures. Composting organic waste from our homes and gardens helps protect the environment and create resilient communities.
Frequently asked questions (FAQ)
Which is 'better' - cold composting, hot composting, bokashi, worm composting, or trench composting?
There is no such thing as a ‘better’ system, only the system that suits you best. Each method has its pros and cons.
Cold composting
Pros: It’s very simple to get up and running, and you don’t need specific tools – you don’t even need a compost bin if you go with an open heap. Start immediately. You don’t need to learn any technique or do much maintenance.
Cons: It’s a slower method, taking 6 to 18 months before you have a usable compost. Unlikely to get hot enough to kill weed seeds or pathogens. If you compost meat, dairy, or cooked food, you might have to deal with pests.
Good for: Anyone who wants to compost with minimal effort and doesn’t need super-fast results.
Hot composting
Pros: Produces finished compost in weeks rather than months, kills weed seeds and pathogens, and can handle a wider range of materials.
Cons: However, it requires a critical mass of material (at least a cubic metre), careful balance of ingredients, regular turning, and monitoring. It’s a commitment – you need to build the heap all at once rather than adding to it gradually.
Good for: People with access to large quantities of garden and kitchen waste who want fast results and want to compost weeds and diseased plants.
Bokashi
Pros: Handles most things your kitchen will produce, including meat, dairy, and cooked food – it’s a sealed bin so no pest attraction or smell during fermentation and takes up very little space.
Cons: Needs a specific setup that most people will need to purchase, plus the special inoculated bran as an ongoing cost. The liquid produced smells strong. After fermentation, you still don’t have finished compost – you need to bury the result (often called pre-compost) in the ground or add it to an existing compost system.
Good for: People in homes without the outdoor space required for a heap or people who generate a lot of ‘tricky’ food waste like cooked food, meat, and fish AND who can access open ground or a compost system to deal with the pre-compost bokashi creates.
Worm composting (vermicomposting)
Pros: Worm bins produce excellent castings – probably the highest quality compost of any method – and work indoors or out in a compact space. Worms process food scraps quickly, and the liquid feed is useful too.
Cons: Worms are fussy about conditions: too hot, too cold, too acidic, or too much of the wrong thing and they’ll die. They can escape out of closed bins if they aren’t perfectly happy. They can’t handle woody material, large quantities of food at once, or anything too oily.
Good for: People who want high-quality soil amendment and don’t mind giving a bin a bit of attention. Also for people with limited outdoor space or who can accommodate a bin indoors.
Trench composting
Pros: Requires no bin, no turning, and no ongoing management – you bury waste and forget about it. It enriches specific areas of soil directly, handles a wider range of materials than cold composting because it’s buried, and attracts no pests.
Cons: You need free garden space for your hole or trench, and you can’t use that area until the waste has decomposed (3-6 months). There is no finished pile of compost you can use elsewhere.
Good for: People who want to enrich specific beds and/or don’t want a visible compost system.
What can you add to a cold compost?
Anything that is organic (was once living) will be fine in your compost heap. We look elsewhere at those ‘tricky’ items like meat and bone – the reasons to not use them are practical and not because they won’t compost. So if it is something you grow in your garden or something you eat, yes, it can go in the compost. That includes all fruit and veg, banana peels, onions, bread, nuts, jam, eggshells, tofu, coffee, grains, mouldy food, and tea leaves. In addition, a household creates other organic waste that can be added to compost such as pet bedding, hair, cardboard, tissues, egg cartons, wood ash, newspaper, etc. What you do want to avoid are household products that have been made of unknown materials (they might contain things like plastics or chemicals that you wouldn’t know about) – for example, tampons, cigarettes, cosmetics, or glossy-printed packaging.
Lots of people have very firm ideas about what can and cannot be composted, but a lot of this is just because that’s how they’ve always done things. Or they may be generalising based on the specific method they use or even cultural norms. The key thing to remember is that there is not a ‘right’ or ‘wrong’ way to compost. Find the way that works for you. Chuck in what you want and watch it transform into “black gold”.
We’ve created a ‘Compostable or Not?’ tool with over a hundred items you can get specific advice about. Just type in your item and get clear, no-drama compost advice!
What not to add to cold compost
- It doesn’t make sense to create a natural product like compost and then add toxic products derived from petrochemicals, like petrol, engine oil, lubricants, vaseline, industrial glues and paints, or diesel. These are best disposed of at municipal facilities.
- Metals and glass can’t be composted. It’s not that they will contaminate your compost so much as they won’t rot down and you’ll have to fish them out of your finished compost.
- Pet and livestock poo is fine, but most people stay clear of cat and dog poo because they contain parasites and pathogens that survive the composting process. Toxoplasmosis, from cat faeces, is particularly dangerous if you’re pregnant or have a weakened immune system (it’s inadvisable to even clean a litter tray). Some people do still compost these, often in a heap that is left for a long time and then only used in ornamental areas of the garden.
- Composting human poop is a subject in its own right that we will cover soon. Lots of people successfully compost their own waste, although many don’t use the final product on food-producing gardens. We don’t recommend you do this without thorough research.
One thing that all composters agree on is that those colourful sticky labels on fruit and veg should never go in the compost. Even after everything else has decomposed and turned into lovely compost, those stickers remain perfectly intact!
How important is the carbon–nitrogen balance in cold composting?
Lots of articles about compost emphasise the importance of balancing your carbon-rich materials (‘browns’) and nitrogen-rich materials (‘greens’). A commonly accepted guideline is roughly 2–3 parts browns to 1 part greens by volume. Browns include dry leaves, shredded cardboard, paper, straw, and wood chips. Greens include food scraps, fresh grass clippings, coffee grounds, and manure. Too many greens lead to a wet, smelly pile. Too many browns slow decomposition to a crawl. But neither of these ratios will stop the compost entirely.
In cold composting, the carbon–nitrogen balance is not critical the way it is for hot composting. Decomposition will still happen, it just happens more slowly and less predictably. But the micro-organisms that make your compost will adapt to what is available, and over time most organic matter will break down regardless.
What are the must-have tools and products for good composting?
You do not need to buy anything at all in order to compost.
Nature has been composting for millions of years. It was doing it a long long time before humans became interested in gardening. Today, there is a massive global industry built on convincing people they need specific products to succeed at things nature does for free. It thrives on making simple processes seem complicated and technical, then selling you the ‘solution’. It’s the same playbook across gardening – special feeds, specific tools for every task, and products for problems you didn’t know you had. Some things genuinely are useful (a decent spade, for instance), but most are just ways to extract money from people who’ve been convinced that nature needs help.
You don’t need tools or products to compost successfully. Everything marketed as ‘essential’ for composting – compost bins, thermometers, aerators, accelerators, activators, and moisture meters – is optimisation at best and pointless at worst.
The only genuinely useful tools are things you probably already own:
- Something to carry waste from the kitchen to the heap (a bowl or bucket)
- Something to water it if it gets too dry (a watering can or hose)
- Something to move material around if you want to turn it (a fork or spade)
That’s it.
What's the best compost bin for cold composting?
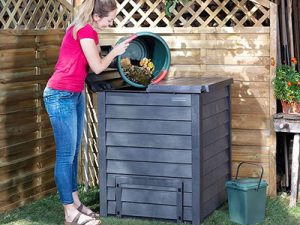
Daleks, the popular name for those green or black plastic compost bins, are sometimes subsidised by local authorities. They are a bit on the small side, but there is absolutely nothing wrong with them if you want something tidy and largely pest-proof (if you put a mesh on the ground below your dalek, it’s pretty hard for even smaller pests like rats to get in). They work, but they’re not optimal. People often buy them because they feel like they’re the ‘proper’ way to compost.
Tumblers are marketed for ease of turning, but they’re actually problematic for both hot and cold composting. Because they’re quite small, you don’t get the critical mass needed to generate and maintain the temperatures needed for hot composting. For cold composting, the sealed design and lack of contact with the soil mean worms and soil organisms can’t move in naturally. They also tend to go anaerobic easily because turning doesn’t add as much oxygen as you’d think (you’re just rotating a sealed drum). We wouldn’t recommend them for a cold heap.
Insulated bins are designed to help maintain heat and are primarily for hot composting. In cold composting, the insulation doesn’t add any value because you’re not trying to generate heat anyway. They’re also quite expensive.
Pallet bays are the simplest thing to build yourself, and pallets are often free or at least very cheap. The most basic design is to stand three pallets in a U-shape, then wire, tie, or screw them together at the corners so you have a three-sided bay that’s open at the front. You can close the front with a fourth pallet to keep it looking neater, or just leave it open. Some people build two bays side by side so they can move material from one to the other as it breaks down. You can even add a third bay to store your finished compost while you build up your new heap in one of the other bays.
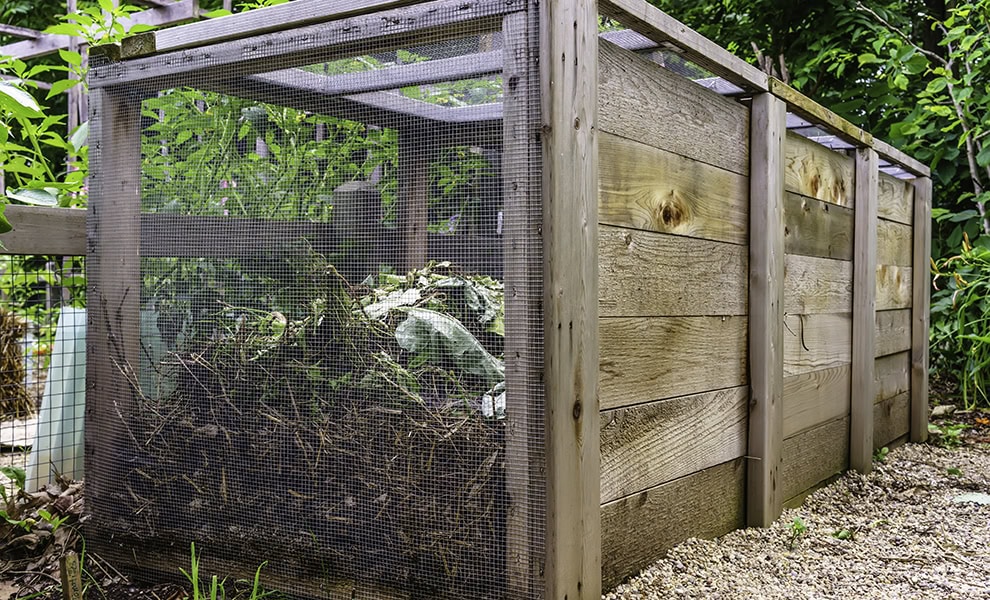
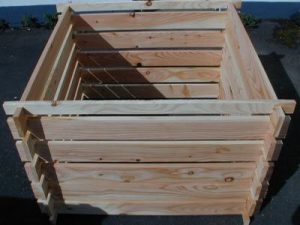
Wooden bays usually come as a square or rectangular design featuring one, two, or three bays. You can buy a kit (there are products to suit every budget) or try your hand at making your own. The simplest design is four corner posts driven into the ground with horizontal slats or planks between them – 1 metre square is a good size if you have the space. Leave gaps between the slats for airflow (unless building a solid wall is essential for pest deterrence). Some people make the front removable (using slots or hooks) so you can access the finished compost at the bottom more easily.
Repurposed/alternative bins might be a solution if you are on a budget but want something to contain your heap. Get creative; there are no rules! For example, you could use an old dustbin, wine barrel, or fermentation vat, drill holes in the sides and base, and set that up in your chosen spot. Lots of people use building/cement blocks to make the walls of their heaps. Straw bales actually work really well as walls too. Yes, they will eventually rot away, but not as quickly as the heap inside. Once the compost is ready, the mouldy old bale walls become part of your next heap. You can have woven walls using material like willow, dogwood, or hazel. Drive stakes in the ground marking the perimeter, then weave branches horizontally in and out to create the effect of a giant basket.
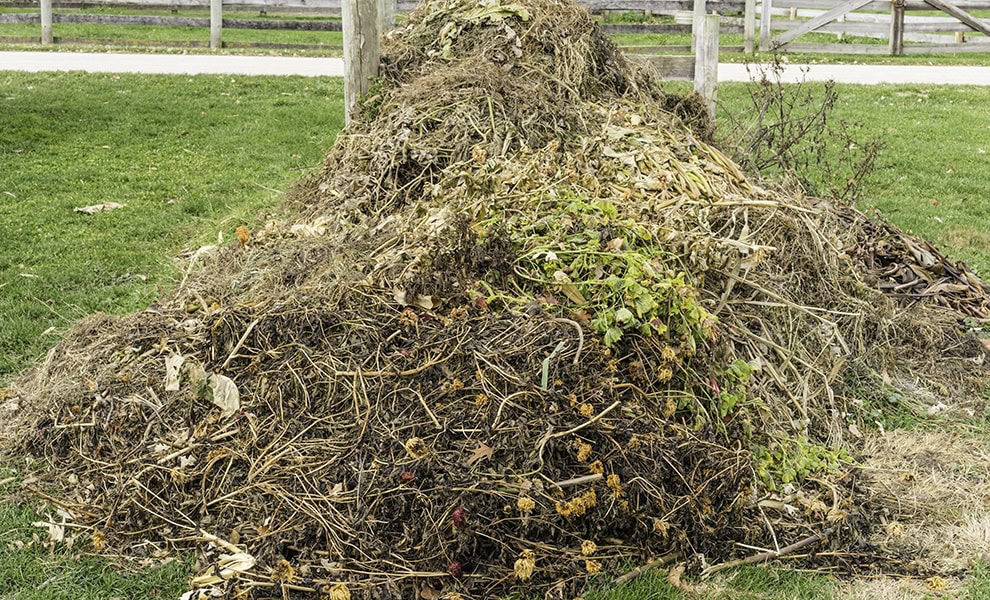
A pile on the ground is by far the easiest way to make a compost heap and requires zero investment. It could go on open ground or tucked against a wall. Just because it is unstructured doesn’t mean it’s not a ‘proper’ compost heap!
The best bin is the one that doesn’t stop you from composting. Everything else is just preference and aesthetics.
What's the best way to collect kitchen scraps for composting?
A small bin or container on the counter or under the sink is the most common. The size needed will depend on how often you empty it, from a small tub on the worktop for daily/twice-daily emptying to a bucket under the counter/in a cupboard if emptying once a week. Unless you empty it daily in the summer, a lid will be useful to keep flies away.
Some people line their container with newspaper or cardboard to absorb liquid and make it easier to tip out. Others just rinse it afterwards. A handful of sawdust/shavings in the bottom also helps to soak up liquids.
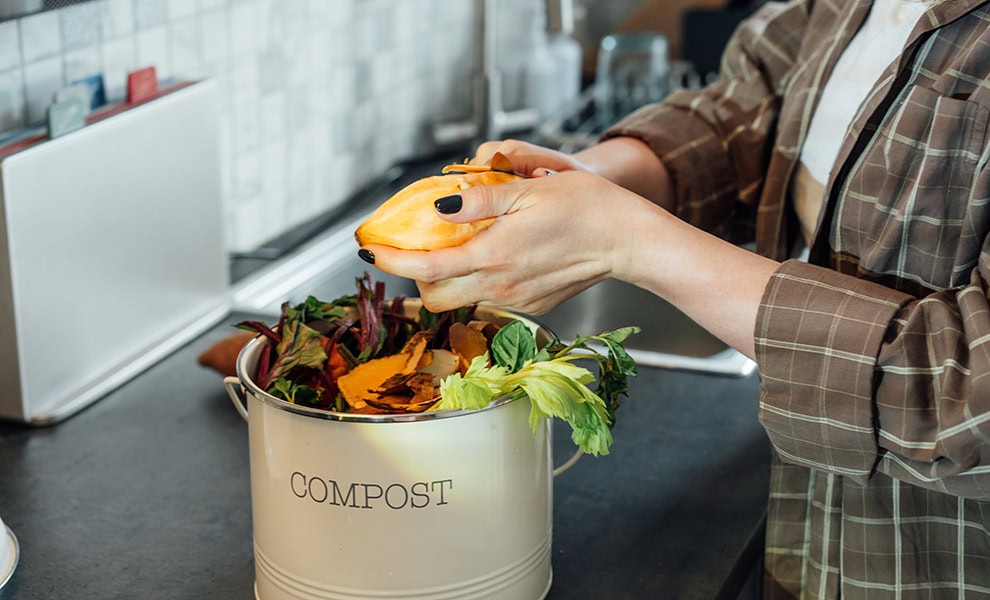
You can buy a dedicated bin sold for this purpose (often made of stainless steel), and these sometimes come with a carbon filter in the lid to reduce smells (genuinely unnecessary if you empty it regularly). Although an old bucket under the sink works just fine, you may prefer the convenience of a container on the counter.
If you’d like something prettier than a tupperware but you’re on a budget, you can easily repurpose something like an old casserole dish, bowl, or soup tureen from a thrift shop or flea market (tureens come with lids, so they are perfect!). Ceramic, like stainless steel, is great because it won’t stain or retain smells.
Should organic scraps be prepared and dehydrated before being added to compost?
No. Dehydrating scraps before composting is counterproductive. Composting works because moisture enables microbial activity. Dry material resists decomposition; that’s why dry leaves take so long compared to fresh green scraps. You’d be deliberately slowing down the very process you’re trying to encourage. Fresh scraps also break down faster because they’re softer and more accessible to microbes and worms – dehydrating them makes them harder and more inert.
The only scenario where drying material makes sense is if you specifically want to kill something in it – like drying out perennial weed roots in the sun before composting. But that’s targeted management, not preparation for faster decomposition.
Chopping or breaking up material into smaller pieces does help because there is more surface area for microbes to work on. Some people take this idea a bit too far and run their scraps through a blender or food processor first. Unfortunately, this turns the waste into a kind of slurry that blocks airflow and can become very smelly. It’s not necessary and can actually slow things down. So, by all means cut your broccoli stems in half or rip up cabbage leaves and banana peels if you want to. If you don’t, everything will still be fine!
How do I 'activate' my compost?
Until human beings came along, organic waste lay in huge piles all over the world, waiting to be activat… err? Hang on, that can’t be right.
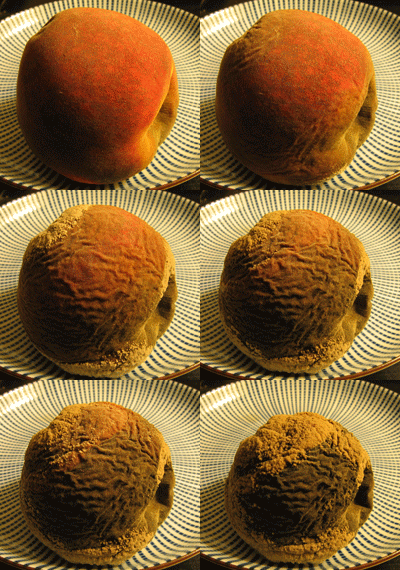
The reality is that nature doesn’t need us to do anything. It definitely doesn’t need us to manufacture bottles of ‘activator’. Composting happens whenever organic matter dies – it’s happening all around us, all the time. When you compost at home, you are simply creating a centralised spot to compost, because this makes it easier to collect materials and access the finished product. Everything needed for composting is already present in the materials themselves, the soil, the air, and the water. A good mix of different materials, including some nitrogen-rich and some carbon-rich inputs, is all that is required. ‘Activation’ is a word that gets bandied about as if it were one of the ingredients a compost heap needs. It is not. Everything in your heap is already ‘activated’ in the sense that it contains the natural biology required for decomposition.
If you really want to accelerate the beginning of your compost process, just mix in as many different materials as you can, making sure to have both greens and browns. For example, kitchen scraps, chicken poop, grass clippings, and urine (all nitrogen-rich) along with straw, cardboard, wood shavings, and dead leaves (carbon-rich) plus a good soak. That will get things off to a good start. Some people add finished compost from a previous heap, but it’s not essential. If you can’t get your hands on all those things at once, it’s fine. Just start with what you have.
There is absolutely no need to purchase compost activator products. They don’t contain anything your compost heap won’t develop on its own, and they will not improve the end product in any way.
My compost is full of creepy-crawlies and other creatures. How do I get rid of them?
A healthy compost heap is a wonderful place that will naturally attract a wide range of organisms. This is a good thing! The decomposition process attracts and relies on bacteria (aerobic and anaerobic), fungi (including moulds and actinomycetes), protozoa, nematodes, rotifers, springtails, mites, woodlice, beetles and their larvae, ants, spiders, millipedes, centipedes, slugs, snails, earthworms, enchytraeid worms (potworms), fly larvae (yes, maggots!), and yeasts. These all rely on a complex web of interdependencies, and getting rid of any of them will leave your compost heap poorer. In addition, your pile could be a refuge or feeding ground for amazing creatures such as toads, hedgehogs, beetles, bats, birds, slow worms, grass snakes, and other small mammals.
Some people are surprised by just how many bugs and critters are in their heap. If the conditions are just right, you can pick up worms by the handful; there are so many of them so densely packed together. This is completely normal – you haven’t done anything wrong! Biodiversity is under pressure in every corner of the world; if bugs have found a home in your compost bin, celebrate the fact and do not hurt them.
A few visitors might be genuinely unwelcome:
- Rats or mice: As mentioned elsewhere, bury food they are attracted to or consider a rodent-proof bin or base. Rats don’t like to be disturbed, so siting the compost in a busy part of the garden and tapping it whenever you walk by could be enough to encourage them to move on.
- Wasps: Wasps nesting are going to hinder you accessing your bin (especially if you are allergic to their sting). Their presence indicates prolonged dryness. Wet the heap and disturb the area; they will usually leave.
- Flies: Persistent clouds of houseflies indicate exposed food waste. Cover your additions with a good layer of leaves, cardboard, straw, sawdust, etc. (browns) or old potting compost.
- Potworms: Large numbers of Enchytraeidae signal excess moisture and low oxygen. These white worms in your compost are not harmful, but they do thrive in conditions that other worms don’t like. You can add dry browns – leaves, cardboard, straw, sawdust, etc. – and improve drainage or aeration.
What do I do if there are pests like rats, foxes, or other animals going through my heap?
Whether pests are a problem depends entirely on where you live. In some areas, rodents like rats are abundant, while in others they are barely an issue. The key thing to understand is that they aren’t summoned by your compost; if they’re in your neighbourhood, they’re already there, living in the sewers, sheds, walls, and ditches in/near your garden. An open heap with meat or cooked food on the surface just gives them a convenient reason to visit your garden.
If pests are a problem in your area, an enclosed bin with a secure lid and a mesh base should solve the problem. Burying food scraps under a layer of browns rather than leaving them on the surface could be enough to deter bothersome animals. Where humans live side by side with animals like bears, properly secured systems are a must. If you live somewhere like Ireland or the UK, common sense about what you add and how you add it is enough. Try it, observe what happens, and adjust accordingly. What works three streets away might not work for you, and vice versa.
Where should I put my compost heap?
There is no right or wrong location for a compost heap. Place it somewhere convenient – somewhere that, even when it’s cold or raining, it’s not a big deal for you to carry over your container of waste from the kitchen. Direct contact with soil is ideal so that the worms and microbes can move in from below. Dappled/partial shade stops it getting too dry in summer while allowing it to catch a bit of sun in winter. Don’t overthink it; site your heap or bin where you’ll actually use it, which usually means reasonably close to the kitchen but not right next to the back door where smells could waft inside.
How long does it take for compost to be ready?
Temperature affects how long it will take for your waste to become compost. Things will naturally slow down in winter and speed up in summer, but don’t worry if your heap looks frozen solid or covered in snow – it’s not ruined and it doesn’t need intervention. Wait for temperatures to come back up, and decomposition will naturally start up too. Other factors that will affect the time it takes are:
- How small/broken up the materials are (whole cabbage vs shredded leaves)
- How wet or dry it is (too dry = slow, too wet and compacted = anaerobic and slow)
- The mix of materials (all grass clippings in a slimy mat vs varied materials)
- Volume/size of heap (bigger retains some heat; very small heaps are slower)
- What you’ve put in (soft fruit breaks down faster than woody stems or cardboard)
Your compost is ready once the material at the bottom is dark, crumbly, and soil-like. It won’t look like shop-bought compost and that’s fine. You might find bits of things that haven’t fully broken down yet – like twigs, avocado stones, or eggshell. Sieve them out and return them to the heap, or just use the compost as it is.
There isn’t a single moment in time when you have to remove your compost from the heap. You could decide to use it while it’s still a little chunky because the time is right for you, or leave it where it is for an extra six months.
Do I need to turn my compost heap?
You do not need to turn a cold compost heap. Turning speeds things up by adding oxygen and mixing the materials, but it’s not required. If you never turn your heap, it will still decompose – just slower. Turn it if you feel like it or if it’s gone slimy and smells bad (turning adds air, which fixes both issues). Otherwise, leave it alone.
Should a compost heap be covered?
Whether or not to cover your cold compost heap will depend. A cover (lid, tarp, or similar) can help if your area gets torrential rain that waterlogs the heap, or if you want to keep more heat in. But uncovered heaps work fine too, as the rain provides moisture and the heap drains naturally into the ground below. The best thing is to observe it over time and adapt your approach accordingly. You can stick your hand inside and feel the difference between the materials being just moist (perfect) or soggy (potentially an issue if it persists).
Why does my compost heap smell?
A healthy working compost heap smells earthy, a bit like the forest floor. If it smells bad – sour, rotten, or like ammonia – something is probably out of balance. Usually this means it’s too wet and airless, so to help this, you can turn it and/or add some dry material like ripped-up cardboard or dry leaves. The smell could come from meat, dairy, or cooked food decomposing. In that case, your options are to cover it with material like cardboard, clippings, leaves, or straw; turn the heap; bury those kinds of materials deeper in the heap; or switch to using an enclosed bin instead. It doesn’t mean you need to stop adding those things – it means you need to manage how you add them. Vegetable-only heaps in good condition don’t smell offensive.
Something's gone wrong, should the compost be thrown away?
There is almost no scenario where a compost has ‘gone wrong’ to the extent you have to throw it in the bin and start again, with the exception being that some something genuinely toxic was added to it, like weed-killer or commercial paint. But just because someone doesn’t know your house rules and added something you have chosen not to (bones, meat, and cooked rice are good examples where some people have chosen not to have to deal with them in their heaps) doesn’t make your heap ruined.
Remember that lots of factors affect the speed of decomposition, so whether your heap is damper or drier, cooler or warmer than someone else’s will only affect the time it takes to get to finished compost and not the quality of the compost itself. Real compost heaps are messier than on Instagram – they have layers at different stages, bits that haven’t broken down, and the odd volunteer tomato plant growing out of them. As long as it’s gradually decomposing and doesn’t smell terrible, it’s working. Sit back, listen to the bees, and let it do its thing.
I saw rats/mice in my compost. Is it safe to use or is it contaminated now?
Your compost is fine to use. Everything that lives produces waste – animals, insects, birds, plants, fungi, bacteria… Waste and decomposition are happening constantly everywhere in nature, in your soil, in your garden, in every ecosystem. This is normal and essential to how the planet functions. Rats and mice – or whatever other mammals you spot in your compost – are no different. Their droppings break down in the composting process just like any other organic matter.
The reason most people decide not to compost cat and dog waste is specific: those animals carry pathogens like toxoplasmosis and parasites that survive composting and are dangerous to humans. Rodent waste doesn’t have the same issue; it decomposes safely along with everything else in your heap.
Rats are omnivores. They eat things like seeds, grains, nuts, flowers, fruit, veg, leaves, insects, birds, meat, fish, eggs, and fungus. The presence of rodents means they found something they like to eat there (hardly surprising, as anything from your kitchen is likely to delight them) and/or that your heap provides shelter. It doesn’t mean the compost is contaminated or unsafe. Once the material has fully decomposed into dark, crumbly compost, any traces of their waste will have broken down too. There’s no scientific reason to throw the compost away.